top of page

As we enter 2025, the way we display and integrate art into our living and working spaces is evolving. Art has the power to transform a room, evoke emotions, and bring personality into any environment. Whether you're an experienced collector or just starting your art journey, knowing how to display your art like a pro can make all the difference in creating a space that feels cohesive, inspiring, and visually stunning.

Here are some creative interior design tips for displaying your art in 2025, from minimalist to eclectic styles, along with expert advice on framing, lighting, and arrangement techniques that will elevate your collection.


1. Embrace Minimalism: Less is More

In 2025, minimalist interiors continue to dominate, with clean lines, neutral colors, and open spaces creating a calming atmosphere. Art plays a vital role in breaking up the simplicity of a minimalist space without overwhelming it.

How to Display Art:

  • Choose one or two striking pieces that become the focal point of the room. A bold, large-scale artwork can have a dramatic effect in a minimalist living room or office.

  • Opt for frames that complement the minimalist aesthetic—think simple, sleek frames in black, white, or natural wood finishes.

  • Keep the wall space around the artwork uncluttered. In a minimalist setting, less is often more, and letting the art breathe with plenty of negative space can create a powerful visual impact.

Pro Tip: Consider a monochrome palette for your artwork to maintain cohesion with a minimalist design. Black-and-white photography or monochromatic abstract paintings work particularly well in these spaces.

2. Create an Eclectic Gallery Wall

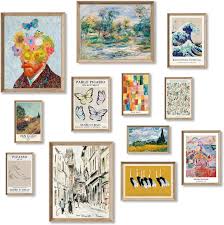
In contrast to minimalist spaces, 2025 is also embracing the charm of eclectic interiors—bold, dynamic, and full of personality. An eclectic gallery wall can showcase the diversity of your art collection and become an expressive feature in any room.

How to Display Art:

  • Mix and match different frame styles and sizes for an eclectic vibe, but ensure the overall layout feels balanced. Try arranging your pieces in a grid pattern, or experiment with a more organic, freeform layout that flows across the wall.

  • Pair various mediums, like paintings, photography, and prints, to create visual interest. For instance, juxtapose abstract works with figurative art or mix vibrant pieces with more subdued tones.

  • Use different framing styles—vintage frames, floating frames, or even frameless pieces—depending on the look you're going for.

Pro Tip: Start with a central piece as the anchor, and build the rest of the gallery wall around it. This will provide balance and avoid the arrangement feeling too chaotic.

3. Incorporate Art into Functional Spaces

In 2025, home offices, kitchens, and even bathrooms are being designed with art in mind. These spaces no longer have to be purely functional—they can be filled with personality and style through thoughtful art displays.

How to Display Art:

  • In a home office, hang a statement piece behind your desk to inspire creativity or set the tone for virtual meetings. Consider oversized pieces or art with bold colors to energize the space.

  • In kitchens, consider hanging smaller art pieces or decorative plates on open shelving or above the countertop. Abstract or botanical art works well in these settings.

  • In bathrooms, choose artwork that complements the calm, spa-like atmosphere. Watercolors or nature-inspired pieces are great options for this space.

Pro Tip: In spaces like kitchens or bathrooms where humidity can be an issue, opt for framed prints on metal or acrylic, or avoid expensive, delicate pieces that may be vulnerable to the environment.

4. Highlight Art with Strategic Lighting

Proper lighting can completely transform how your art is perceived. 2025 is all about creating layers of light, using both natural and artificial sources to highlight your artwork.

How to Display Art:

  • Install track lighting or adjustable picture lights to focus on the artwork. This can make a significant difference in how colors and details in the piece are brought to life.

  • Use dimmable lights to adjust the ambiance based on the time of day or the mood you want to set. LED lights with a color temperature of 3000K to 3500K work best for illuminating art without distorting the colors.

  • If you're displaying art in a room with natural light, position the artwork to avoid direct sunlight, which can cause fading over time.

Pro Tip: Consider placing art at eye level (around 57 to 60 inches from the floor), and ensure the light hits the artwork at a 30-degree angle for the most flattering effect.

5. Blend Art with Furniture and Decor

The art you choose should feel like a seamless part of the overall design, not something that’s just hung up as an afterthought. Integrating art with your furniture and decor can create a harmonious space.

How to Display Art:

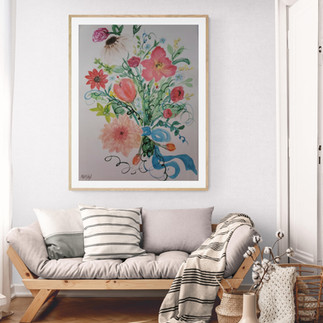
  • Pair artwork with furniture in a way that balances the room. For example, place a large canvas behind a sofa to serve as the centerpiece of the living area or above a console table.

  • Consider the colors in your art when choosing complementary furniture or decor. A painting with rich blues can pair well with neutral-toned furniture, while a bright, colorful piece might inspire more vibrant decor choices.

  • Don’t forget about the floor. Sculptures or art in unexpected places, like leaning against the wall on the floor or placed on pedestals, can add dimension and interest to the space.

Pro Tip: If you have a statement piece of furniture, let it “frame” the artwork—think of a sofa or chair as a physical frame for the art. This approach ensures the art feels integrated into the space, not isolated.

6. Experiment with Scale: Think Big and Small

In 2025, we’re seeing a trend of mixing large statement pieces with smaller works of art. Combining different scales creates visual interest and allows each piece to shine in its own way.

How to Display Art:

  • Large pieces make bold statements—consider one oversized canvas as the centerpiece of a room, especially in a minimalist setting. If you're working with a smaller space, think about how a large piece can command attention without overwhelming the room.

  • Smaller works, such as intimate portraits, miniatures, or sketches, can be arranged in a grid or a collection on a shelf or mantel, allowing collectors to create a narrative or theme with the pieces.

Pro Tip: If you have multiple smaller pieces, consider grouping them together on a feature wall. This can create the illusion of a larger art piece, while still keeping the collection cohesive.

Conclusion

In 2025, art isn't just something to look at—it's an integral part of how we express ourselves and design our spaces. Whether you prefer the clean, structured approach of minimalism or the vibrant, layered richness of eclectic interiors, the way you display your art can elevate your space and bring your collection to life. Keep these interior design tips in mind as you transform your home or office into a beautiful, art-filled sanctuary.

11 views0 comments


What’s Happening in the Studio & Looking Ahead to an Exciting New Year!

Hello, art lovers! I wanted to take a moment to reflect on the happenings in the studio and share what’s on the horizon for the coming year. As I pour my heart into each piece, I’ve felt a bit of a dip in my art journey lately, but I’m more committed than ever to sharing vibrant, meaningful works with all of you. Creating brings me such peace and joy, and I want to offer that same sense of warmth and beauty through my paintings.


Upcoming Events & Fresh Collections

This year brought some beautiful, memorable moments – workshops full of laughter, connections made at pop-up events, and of course, the joy of seeing my art find its way into new homes. For the coming year, I’m focusing on creating collections that speak to my love for nature, color, and flow. There’s something special planned for each season, from the farm workshop in March to our cozy January session at the LOOM.

I’m also thrilled to bring a new series centered on the fascinating world of bees! This collection will be a fresh exploration, celebrating these tiny but mighty creatures in a way that’s uniquely mine. Each piece will have its own story, woven with the colors and textures I love most.


Your Invitation to Collect a Piece of the Journey

For those who have been part of my art journey, thank you for your continued support. If you’ve been considering adding another piece to your collection, now might be the perfect time. As I evolve and grow, I’m pouring everything into creating pieces that are both personal and inspiring. Whether it’s a painting inspired by my travels, the garden, or my exploration into new techniques, I hope one of these works finds a place in your home.

Let’s stay connected as we step into another year of art, color, and creativity. Thank you for being here – I look forward to bringing you more beauty, joy, and perhaps a little peace in the new year.

3 views0 comments

Host Your Own Art Party: Fun, Friends, and Creativity!

There's nothing quite like a party to bring friends and family together. So why not make it an art party? All you need are some creative ideas, tasty snacks, and maybe some "adult beverages"!

Hosting an art party is a wonderful way to connect with friends and family for a truly memorable experience. It offers a unique opportunity to come together, share laughs, and create beautiful art in a relaxed and fun environment. An art party encourages everyone to unleash their creativity, making it a delightful way to bond and enjoy each other’s company. Plus, the joy of creating something unique adds a special touch to your time together. So, gather your loved ones and make your next get-together an unforgettable art-filled celebration!

First, decide on the project you want to create with your guests—perhaps a watercolor project. One of my favorites is watercolor greeting cards, which can be as simple or complex as you like. Another popular option is floral wall art in watercolor, which, like the greeting cards, can be tailored to your guests' skill levels. Finally, consider making fairy lights mason jars. Below, I've covered the basics you'll need for each project. Enjoy!


Watercolor Greeting Cards


Kick things off with one of my favorites, a watercolor greeting cards party. It’s a blast and perfect for any skill level. Here’s what you’ll need:

  • Package of Watercolor cards with envelopes (grab extra if you have a big group)

  • Michael's-Hobby Lobby

  • Watercolor paints (any kind will do)

  • Ink stamps with messages like “Happy Birthday” or “Happy Holidays” (Amazon)

  • Printed poems and greetings (scallop-edged scissors add a cute touch)

  • Extra ribbon and bows for an added touch

Lay everything out so your guests can dive right in. Let them pick their favorite designs, stamps, and poems, and then get creative!


Watercolor Wall Art


Another great project is watercolor wall art, especially florals. Here’s what you’ll need:

  • Simple photos of flowers for tracing

  • Watercolor Paper- 9x12 works well

  • Watercolor paints and brushes

  • Pencils and erasers

Find a bright, well-lit area with lots of window space so your guests can use the windows as lightboxes to trace their designs onto watercolor paper. Once traced, it’s time to paint and let their creativity flow!


Fairy Lights Mason Jars


This project is always a hit: fairy lights mason jars. You’ll need:

  • Small mason jars

  • Dried flowers

  • Mod Podge

  • Cutouts of fairies

  • Battery-operated tea candles

  • Ribbon or string

Set everything out buffet-style so guests can choose their flowers and fairy cutouts. First, paint a layer of Mod Podge on the outside of the jar, add the flowers, and then another layer of Mod Podge. Add the fairy cutouts and Mod Podge one more time, let everything dry, and pop in the candle. For a finishing touch, tie some string around the rim of the jar so it can hang.

And there you have it—an enchanting craft everyone will love!

Make this one a fairy tea party for an extra special party.


Snacks and Drinks

Keep the snacks simple and easy to eat at the crafting table. Think fruit, nuts, cheeses, finger sandwiches, and cookies. And don’t forget the drinks! Offer a mix of alcoholic and non-alcoholic options to keep everyone happy.


Ready to Host?

The trick is to keep it simple and it doesn’t have to be expensive. Most items can be gotten at the local dollar bin.

If you’d love a little extra help, I can guide you through these steps at your next party. Let’s schedule your event today! Email me at marthasfinearts@outlook.com.

Happy crafting, and enjoy your art party!


5 views0 comments
bottom of page